What is Digital Shirt Printing?
Direct-to-garment printing is a process of printing on textiles using specialized aqueous ink jet technology. DTG printers typically have a platen designed to hold the garment in a fixed position, and the printer inks are jetted or sprayed onto the textile by the print head
Direct to Garment Design Equipment
Direct to Garment Process
Step 1. Prepare Artwork
Time: 2 hours – 3 days
It starts with a vector or raster file that your client would like to have printed. In the case of direct to garment printing, files must first be checked for compression artifacts, color profiled, as well as going through a process of color correction specific to the garment color by a production artist in the art department. Once the file adjustments are made, it is sent off to the Direct To Garment (DTG) department to have a file created, that will be read and interpreted by the garment printer.
In the case of the NUBN garments, Brad has usually uses bright colors on light colored garments. This is ideal because it makes the art preparation a little less difficult. We can, however, print bright colors or dark, earth tones on dark shirts as well. We’ll show an example of each.
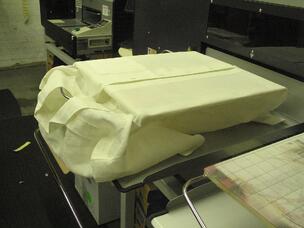
Step 2. Prepare Garment
Time: 5 – 30 minutes
He then, using specialty adhesives, effectively fixes the shirt directly to the DTG platen, making sure his seams are straight and that his print surface is flush with the platen to promote even distribution of ink.
Remember the dark on dark print I spoke of before? Well, all of these steps are required in Brad’s creation, however, there’s more.
Here we see Garvin steaming our chocolate brown linen shirt:
Before printing dark garments, pretreating is required. Using industry standard equipment, the shirts are sprayed with a fine mist of a specially formulated liquid.
Pre-Treating Equipment:
After heat pressing a second time, the pretreat creates a bonding layer for the white ink. The reason for this? White ink is very heavy and not very viscous so it needs a little help standing up to porous surfaces like textiles.
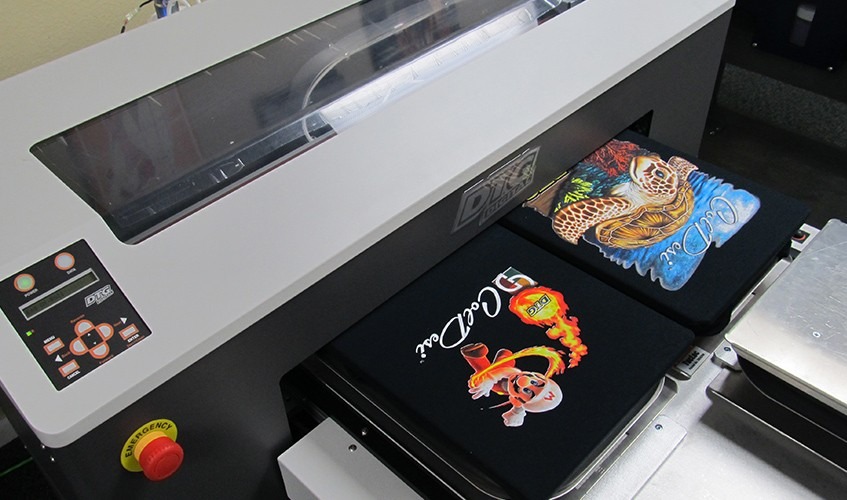
Step 3: Printing
Time: 45 seconds – 5 minutes
Now for a little fusion of relaxation and wracked anticipation; the manual labor is finished, but now the printer has to lay up to three layers of ink in a consistent, uniform manner over 288 square inches (16×18 platen) with no errors. While preparing the next shirt one can’t help but glance at the digital garment printer while it works it’s magic.